Saturday, April 25, 2009
Croissants et Pain au Chocolat: A Tale of Woe (10/22)
When I was 12, my best friend Lauren (still my best friend) pulled me into her kitchen, where we made a batch of chocolate chip cookies. I'd never considered that normal people outside of TV (or at least the ones I knew) made their cookies--in my odd, second-generation way, I thought fridges were designed for oyster sauce and fish paste alone. But that glimpse showed me the knack I have for baking, and the pleasure I derive from it.
My family has never been too crazy about sweets, but Lauren's all-American family sure was, so my baking was strictly limited to her kitchen throughout the rest of middle school and high school. And although I went over there a lot (easy to do when you live down the street), I didn't bake every day. So I stuck to the hits: chocolate chip cookies, the occasional snickerdoodle, and my secret show-stopper: brownies.
I may not have understood what was happening when I combined things, but I knew if I followed the instructions exactly I would have a pan of sweet bribery to offer any takers. Which is easy for me, because I like being manipulative meticulous. Now that I've been baking in my own kitchen for the last few years I've had a chance to diversify, try new things, buy crazy ingredients and tools for myself (like tuile cones, gods know I need six of those).
Once again, this has very little to do with the following subject. It's a pretext for me to hide behind while I explain how sometimes I can get wide-eyed by a single recipe or demonstration I see and am seized by a sudden urge to make THAT, using THAT EXACT recipe, RIGHT NOW. And by now I mean, at some point several months in the future.
Also I blame WikiHow for making "How to Make Croissants" show up on my home page.
In short, I saw a video demonstration for homemade croissants last year, before I was really into baking beyond my limited repertoire, and I was so enthralled by the relatively simple process that I filed the recipe away, never to research the subject again. That was sometime in July. I finally made it in October. And now I'm writing about it in April. How am I graduating college again? (Turned in my last paper Thursday. It feels as good as it sounds, even the whole sleep-deprivation from staying up all night after starting a 12-page research paper midnight of the day it's due thing.)
This is probably the most difficult baking project I've embarked on yet, which I attribute to poor technique and undeveloped baking sense. The recipe itself seems entirely simple, it's really no more than a pâte feuilletée with yeast. If you'd told me that 6 months ago, though, you would have been greeted with silence, a suspicious glare and a slow shoulder twist in the direction away from you. I've since forced myself to become more comfortable with yeast, from breads to sweet doughs, but I still have yet to revisit this recipe. Actually, as a soon-to-be unemployed college graduate, I'm sure I'll have plenty of time!
The recipe comes from Video Jug, a very interesting how-to website devoted only to the video platform. They have sharply produced tutorials without talkative hosts, preferring to use a level-headed voice over narrator instead. This, of course, makes for pure comedy in their romantic advice videos, such as their classic How to Remove a Bra. Since they're headquartered in England, their cooking section features some pretty interesting British classics too. The WikiHow recipe is easy. The Video Jug video they base it off is brainless. (Which explains a lot, when it comes to me.*)
Breakfast: How To Make Croissants
*sly self-deprecation. I'm actually convinced I'm the smartest person in these pants.
I can't say that this recipe produces the tastiest or most authentic croissants, considering I effed them up pretty horridly and it wouldn't be fair to blame outside forces, much as I would like to. Perhaps we'll touch on this again in Croissant Wars: PART DEUX. But until then, here's the play by play.
Ingredients:
17 1/2 oz flour
1/2 oz yeast
3 1/8 oz sugar
1/2 oz salt
10 1/8 oz warm milk
12 oz butter, room temperature
1 egg beaten with 2 tbsp water
extra flour for dusting
Directions:
Begin the dough
Put the flour into the mixer. Add salt, sugar, milk and yeast. Mix on low for 8-10 minutes until it has a smooth elastic consistency. Dust the dough and a large bowl with flour. Remove the dough from the mixer and transfer it into the bowl. Cover with the towel and let rise until it doubles in size, roughly 1.5 to 2 hours.
Prepare the butter
Put a sheet of plastic wrap onto work surface. Place the butter on top and cover it with a second layer of plastic wrap. Flatten with hands, then use a pin to roll into a rectangle about 20 X 25 cm (a sheet of copy paperish) and place into the fridge to chill.
Roll out dough
After the dough has doubled in size, sprinkle with a little bit of flour. Gently deflate and place onto a floured work surface. Roll dough out into a large rectangle approximately three times the length of the sheet of butter, adding more flour as needed to prevent the dough from sticking to the work surface or pin.
Fold in butter
Unwrap the chilled butter and place it onto the middle of the dough. Fold one end over the butter, then the other on top of that. Rotate the dough 90 degrees so the open end of the dough is facing you and the seam is vertical, and roll into another rectangle about the same length it was originally. Fold this into thirds again, brushing off the excess flour as you go. This completes the first turn.
Sigh. Notice the clumps of butter uncouthly puddling around the left side. The right side only looks so straight because this was the point in the recipe after I'd cut the dough in half and frozen one part for future use.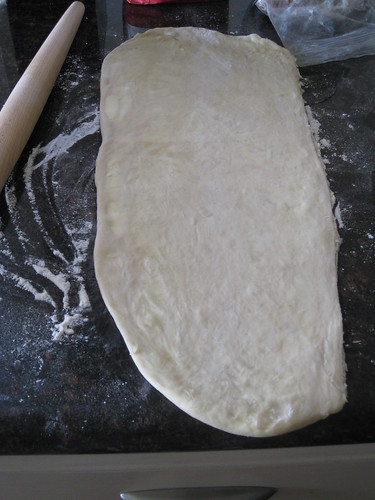
If there is an issue at any point with the butter oozing out of the ends or squishing through the dough, the butter is too warm and needs to go back in the fridge to firm up again. I wish someone had told me that when I was going mad with butter all over my rolling pin. Wrap tightly in plastic wrap and place into the fridge for a minimum of 30 minutes--essentially allowing the dough to relax a bit after all the rolling and giving the butter a chance to become cold again, as butter is one thing raw dough generally shouldn't warm up to. Eh? Eh?
Turn the dough
At the end of the 30 minutes (or however long you need), sprinkle work surface with flour. Unwrap the dough and make sure that the it is placed with the seam vertical (that is, running up and down in relation to you). Dust with flour and roll it out into another rectangle. Fold, brush and wrap, exactly as before. This now completes the second turn.
The key here is to create alternating layers of dough and butter, which in the case of puff pastry results in a delicate flaky mess and in the case of croissant dough results in a chewy delicate flaky mess. That's why there are so many turns and rolls, only no fire drill. If you're careful.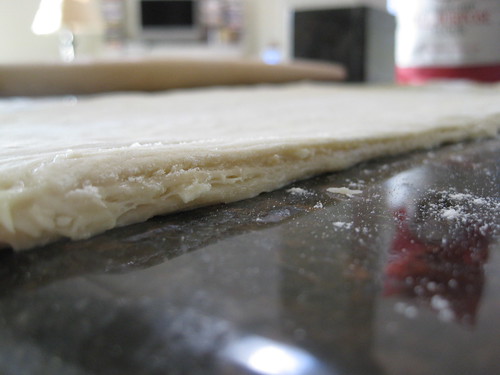
Chill and turn again
Place the back into the fridge for another 30 minutes. Once removed, roll and fold for the third and final turn. Make sure that the dough is well wrapped before placing into the fridge once more to chill overnight.
Shape the croissants
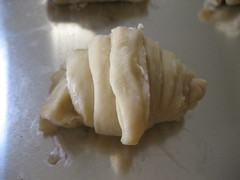
Once chilled, cut the unwrapped dough in half on a floured surface. Dust the dough with some flour and roll one half of the dough into a rectangle. Reflour the surface when necessary and continue to roll until the dough is roughly less than half a centimetre thick. Trim the edges of the dough neatly and cut into triangle shapes (geometry, anyone? We're looking for isosceles here). Take the bottom of the triangle at its widest part and tightly roll it up. You can freeze the other half of the dough for use another time, or repeat the process to make more.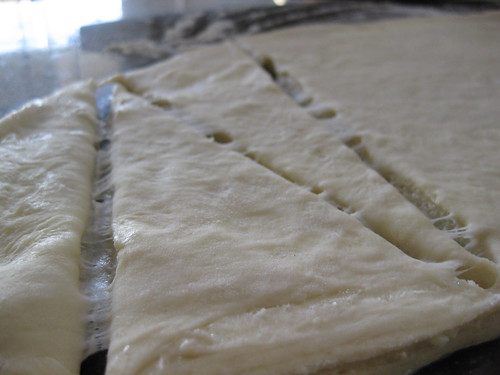
"Oh hey guys, you must have forgotten to invite me but it's cool 'cause I found an invitation. Where's the bathroom?" (below is the culinary version of this scenario)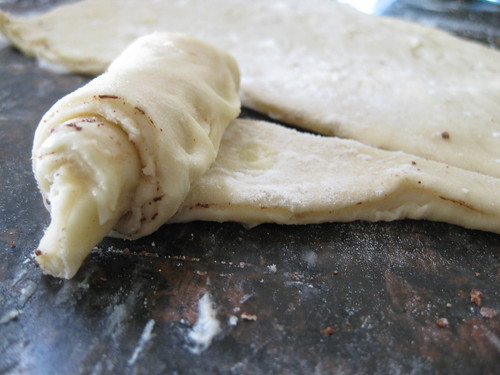
Variations: cut horrible uneven "square shapes" and fill with your confiture of choice, or a gaggle of bloomed Belgian dark chocolate chips like I used here from the back of the fridge.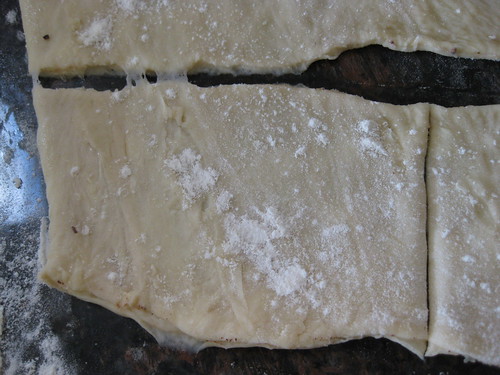
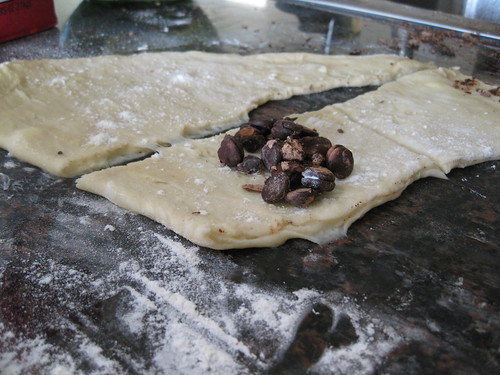
Here we see a classic case of childhood selfishness, wherein the patient refuses to share and conceals all chocolate from outside forces.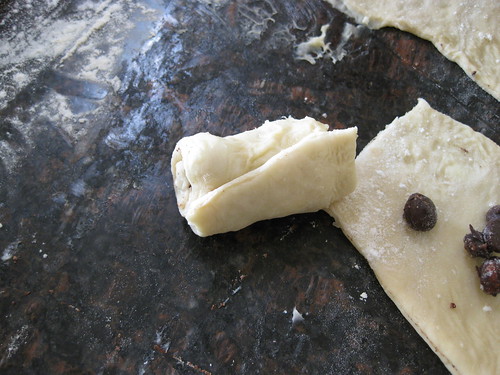
Allow to rise
Place the croissants onto a baking sheet lined with parchment (not entirely necessary, as there's so much butter I don't think you'll have trouble removing them). Place inside clean plastic bag and leave to double in size. Or, if you don't live in England, leave in a warm, draft-free area for 1-2 hours sans bag. Ooh, "sans." Look how continental these are making me.
We've all seen "The Wedding Singer," yeah? That scene where Robbie's fiancee Linda has just left him and he goes to sing at a wedding anyway, and is so raw and emotional in a way only seen in gritty documentaries and 80s period pieces, including the part where he points out the Mutants at Table Nine.
You know, the ones who looked FUBAR?
I'm baring my soul here. Have mercy.
p.s., pre-proof and post-proof. Think maybe I should have been a little less ambitious for my first yeasted recipe?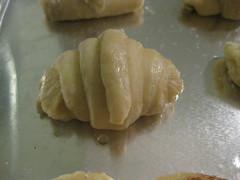
Preheat the oven
Set the oven to 190ºC (375ºF).
Wash and bake
Once the croissants have risen remove the plastic bag, if necessary. Very gently brush them with the egg wash. Place into the center of the oven and bake for roughly 15 minutes. When they are a deep golden brown remove them from the oven.
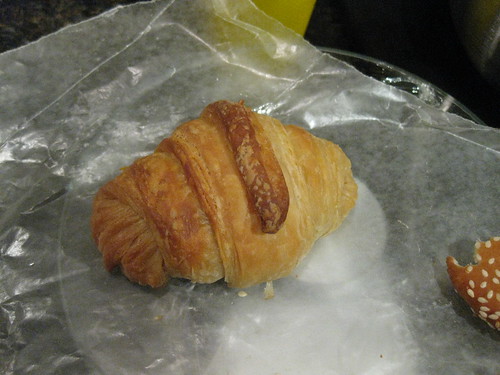
One of my less-unfortunate looking attempts at pain au chocolat.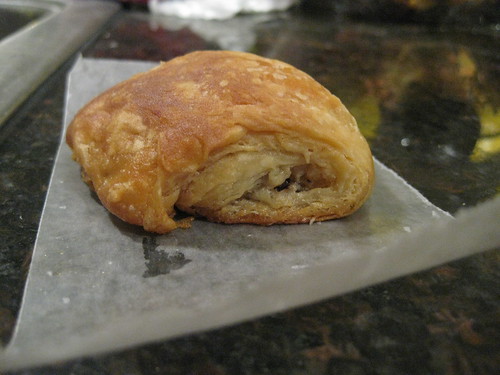
Serve
Your croissants are now ready to serve! They go well with anything, from plain butter, jam and marmalade to ham and cheese. By the way, serving this butter pastry with butter is a GREAT idea. Tell all your friends. And thank you for bearing with me. Don't try this at home.
Homemade Croissants
de Video Jug
Ingredients:
17 1/2 oz flour
1/2 oz yeast
3 1/8 oz sugar
1/2 oz salt
10 1/8 oz warm milk
12 oz butter, room temperature
1 egg beaten with 2 tbsp water
extra flour for dusting
1. Put the flour into the mixer. Add salt, sugar, milk and yeast. Mix on low for 8-10 minutes until it has a smooth elastic consistency. Dust the dough and a large bowl with flour. Remove the dough from the mixer and transfer it into the bowl. Cover with the towel and let rise until it doubles in size, roughly 1.5 to 2 hours.
2. Put a sheet of plastic wrap onto work surface. Place the butter on top and cover it with a second layer of plastic wrap. Flatten with hands, then use a pin to roll into a rectangle about 20 X 25 cm (a sheet of copy paperish) and place into the fridge to chill.
3. After the dough has doubled in size, sprinkle with a little bit of flour. Gently deflate and place onto a floured work surface. Roll dough out into a large rectangle approximately three times the length of the sheet of butter, adding more flour as needed to prevent the dough from sticking to the work surface or pin.
4. Unwrap the chilled butter and place it onto the middle of the dough. Fold one end over the butter, then the other on top of that. Rotate the dough 90 degrees so the open end of the dough is facing you and the seam is vertical, and roll into another rectangle about the same length it was originally. Fold this into thirds again, brushing off the excess flour as you go. This completes the first turn.
If there is an issue at any point with the butter oozing out of the ends or squishing through the dough, the butter is too warm and needs to go back in the fridge to firm up again. Once the first turn is done, wrap tightly in plastic wrap and place into the fridge for a minimum of 30 minutes.
5. At the end of the 30 minutes (or however long you need), sprinkle work surface with flour. Unwrap the dough and make sure that the it is placed with the seam vertical (that is, running up and down in relation to you). Dust with flour and roll it out into another rectangle. Fold, brush and wrap, exactly as before. This now completes the second turn.
6. Place the back into the fridge for another 30 minutes. Once removed, roll and fold for the third and final turn. Make sure that the dough is well wrapped before placing into the fridge once more to chill overnight.
7. Once chilled, cut the unwrapped dough into half on a floured surface. Dust the dough with some flour and roll one half of the dough into a rectangle. Reflour the surface when necessary and continue to roll until the dough is roughly less than half a centimetre thick. Trim the edges of the dough neatly and cut into triangle shapes. Take the bottom of the triangle at its widest part and tightly roll it up. Freeze the other half of the dough for later use, or repeat the process to make more.
Variations: cut dough into smaller rectangles and roll around a stick of high-quality bittersweet or unsweetened chocolate, placing on a sheet seam-side down.
8. Place the croissants onto a baking sheet, lined or not. Place inside clean plastic bag or in a warm, draft-free area and leave to double in size, about 1-2 hours.
9. Preheat the oven to 375F. Remove the plastic bag, if necessary, once the croissants have risen. Very gently brush them with the egg wash. Place into the center of the oven and bake for roughly 15 minutes. When they are a deep golden brown remove from the oven and serve immediately with a mug of hot chocolate, ignoring the terrible mess in your kitchen while trying not to cry.
Variations:
1. Go to Paris
2. Enter a patisserie
3. Politely ask for un (ou neuf) croissant(s), s'il vous plaît
4. PAY and then leave
5. Serve immediately with a mug of hot chocolate


No comments:
Post a Comment