Hi, I'm Christine. These are potatoes that have been sliced and baked with a lot of butter, cream, cheese, cream cheese, and some herbs for the health. I made these during the holidays (welcome, spring!) and kind of regretted it. Click for my tamed-down version of the recipe, but know that even that was really, really heavy. I mean, I can tolerate a lot of fat, but...phew. My sister loved it, by the way. She also eats sunflower seeds in bed, so that should tell you something. Creamy Herbed Potatoes from The Pioneer Woman
Ingredients 4 to 5 russet potatoes 1/2 stick (2 oz) butter 1 medium onion, finely diced 8 ounces cream cheese 1/2 cup heavy cream 1 cup whole milk 1 teaspoon finely chopped rosemary 1 teaspoon finely chopped parsley 1 teaspoon finely chopped chives 1/2 teaspoon finely chopped sage 1/2 cup Parmesan cheese
Directions Preheat oven to 350F.
Slice potatoes very thinly. Melt butter in a large skillet over medium low heat and add onion. Cook for 3 minutes, stirring occasionally. Add cream cheese to the pan and stir to melt. Pour in cream and milk, stirring to combine. Season with salt and pepper to taste, then stir in herbs. Arrange potatoes in a greased baking dish. Pour contents of skillet over the top. Top with Parmesan cheese and bake for 45 minutes, or until bubbly and golden brown. Allow potatoes to sit 15 minutes before serving. Which you should do by giving away. So...much...cream...
When I was 12, my best friend Lauren (still my best friend) pulled me into her kitchen, where we made a batch of chocolate chip cookies. I'd never considered that normal people outside of TV (or at least the ones I knew) made their cookies--in my odd, second-generation way, I thought fridges were designed for oyster sauce and fish paste alone. But that glimpse showed me the knack I have for baking, and the pleasure I derive from it.
My family has never been too crazy about sweets, but Lauren's all-American family sure was, so my baking was strictly limited to her kitchen throughout the rest of middle school and high school. And although I went over there a lot (easy to do when you live down the street), I didn't bake every day. So I stuck to the hits: chocolate chip cookies, the occasional snickerdoodle, and my secret show-stopper: brownies.
I may not have understood what was happening when I combined things, but I knew if I followed the instructions exactly I would have a pan of sweet bribery to offer any takers. Which is easy for me, because I like being manipulative meticulous. Now that I've been baking in my own kitchen for the last few years I've had a chance to diversify, try new things, buy crazy ingredients and tools for myself (like tuile cones, gods know I need six of those).
Once again, this has very little to do with the following subject. It's a pretext for me to hide behind while I explain how sometimes I can get wide-eyed by a single recipe or demonstration I see and am seized by a sudden urge to make THAT, using THAT EXACT recipe, RIGHT NOW. And by now I mean, at some point several months in the future.
Also I blame WikiHow for making "How to Make Croissants" show up on my home page. In short, I saw a video demonstration for homemade croissants last year, before I was really into baking beyond my limited repertoire, and I was so enthralled by the relatively simple process that I filed the recipe away, never to research the subject again. That was sometime in July. I finally made it in October. And now I'm writing about it in April. How am I graduating college again? (Turned in my last paper Thursday. It feels as good as it sounds, even the whole sleep-deprivation from staying up all night after starting a 12-page research paper midnight of the day it's due thing.)
This is probably the most difficult baking project I've embarked on yet, which I attribute to poor technique and undeveloped baking sense. The recipe itself seems entirely simple, it's really no more than a pâte feuilletée with yeast. If you'd told me that 6 months ago, though, you would have been greeted with silence, a suspicious glare and a slow shoulder twist in the direction away from you. I've since forced myself to become more comfortable with yeast, from breads to sweet doughs, but I still have yet to revisit this recipe. Actually, as a soon-to-be unemployed college graduate, I'm sure I'll have plenty of time!
The recipe comes from Video Jug, a very interesting how-to website devoted only to the video platform. They have sharply produced tutorials without talkative hosts, preferring to use a level-headed voice over narrator instead. This, of course, makes for pure comedy in their romantic advice videos, such as their classic How to Remove a Bra. Since they're headquartered in England, their cooking section features some pretty interesting British classics too. The WikiHow recipe is easy. The Video Jug video they base it off is brainless. (Which explains a lot, when it comes to me.*)
*sly self-deprecation. I'm actually convinced I'm the smartest person in these pants.
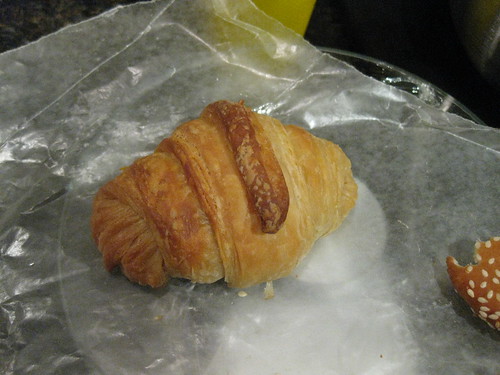
I can't say that this recipe produces the tastiest or most authentic croissants, considering I effed them up pretty horridly and it wouldn't be fair to blame outside forces, much as I would like to. Perhaps we'll touch on this again in Croissant Wars: PART DEUX. But until then, here's the play by play.
Ingredients: 17 1/2 oz flour 1/2 oz yeast 3 1/8 oz sugar 1/2 oz salt 10 1/8 oz warm milk 12 oz butter, room temperature 1 egg beaten with 2 tbsp water extra flour for dusting
Directions: Begin the dough Put the flour into the mixer. Add salt, sugar, milk and yeast. Mix on low for 8-10 minutes until it has a smooth elastic consistency. Dust the dough and a large bowl with flour. Remove the dough from the mixer and transfer it into the bowl. Cover with the towel and let rise until it doubles in size, roughly 1.5 to 2 hours.
Prepare the butter Put a sheet of plastic wrap onto work surface. Place the butter on top and cover it with a second layer of plastic wrap. Flatten with hands, then use a pin to roll into a rectangle about 20 X 25 cm (a sheet of copy paperish) and place into the fridge to chill.
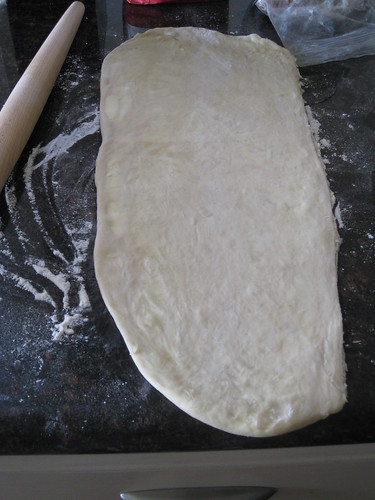
Roll out dough After the dough has doubled in size, sprinkle with a little bit of flour. Gently deflate and place onto a floured work surface. Roll dough out into a large rectangle approximately three times the length of the sheet of butter, adding more flour as needed to prevent the dough from sticking to the work surface or pin.
Fold in butter Unwrap the chilled butter and place it onto the middle of the dough. Fold one end over the butter, then the other on top of that. Rotate the dough 90 degrees so the open end of the dough is facing you and the seam is vertical, and roll into another rectangle about the same length it was originally. Fold this into thirds again, brushing off the excess flour as you go. This completes the first turn.
Sigh. Notice the clumps of butter uncouthly puddling around the left side. The right side only looks so straight because this was the point in the recipe after I'd cut the dough in half and frozen one part for future use.
If there is an issue at any point with the butter oozing out of the ends or squishing through the dough, the butter is too warm and needs to go back in the fridge to firm up again. I wish someone had told me that when I was going mad with butter all over my rolling pin. Wrap tightly in plastic wrap and place into the fridge for a minimum of 30 minutes--essentially allowing the dough to relax a bit after all the rolling and giving the butter a chance to become cold again, as butter is one thing raw dough generally shouldn't warm up to. Eh? Eh?
Turn the dough At the end of the 30 minutes (or however long you need), sprinkle work surface with flour. Unwrap the dough and make sure that the it is placed with the seam vertical (that is, running up and down in relation to you). Dust with flour and roll it out into another rectangle. Fold, brush and wrap, exactly as before. This now completes the second turn.
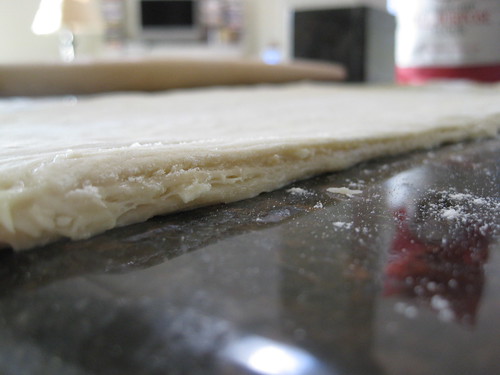
The key here is to create alternating layers of dough and butter, which in the case of puff pastry results in a delicate flaky mess and in the case of croissant dough results in a chewy delicate flaky mess. That's why there are so many turns and rolls, only no fire drill. If you're careful.
Chill and turn again Place the back into the fridge for another 30 minutes. Once removed, roll and fold for the third and final turn. Make sure that the dough is well wrapped before placing into the fridge once more to chill overnight.
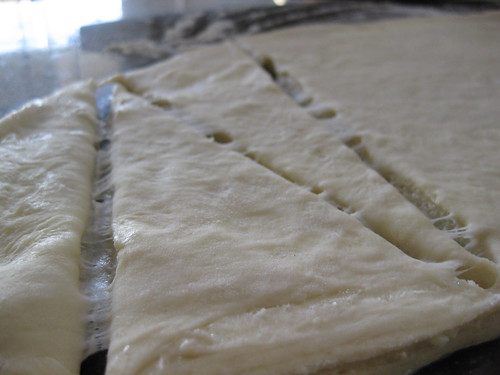
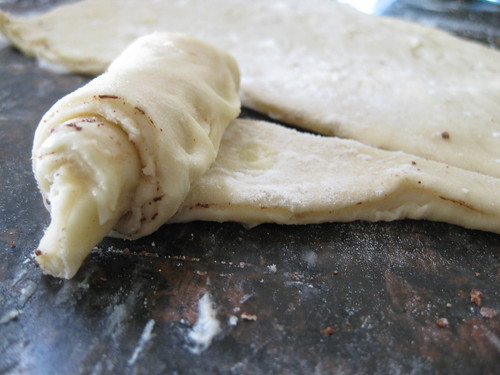
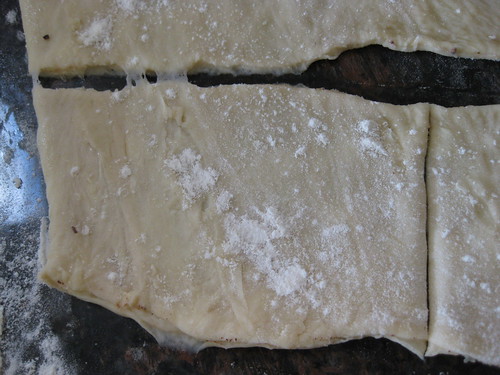
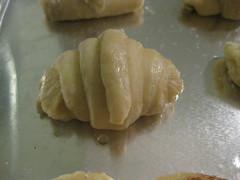
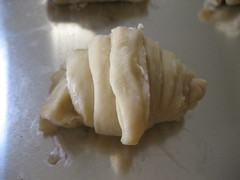
Shape the croissants Once chilled, cut the unwrapped dough in half on a floured surface. Dust the dough with some flour and roll one half of the dough into a rectangle. Reflour the surface when necessary and continue to roll until the dough is roughly less than half a centimetre thick. Trim the edges of the dough neatly and cut into triangle shapes (geometry, anyone? We're looking for isosceles here). Take the bottom of the triangle at its widest part and tightly roll it up. You can freeze the other half of the dough for use another time, or repeat the process to make more.
"Oh hey guys, you must have forgotten to invite me but it's cool 'cause I found an invitation. Where's the bathroom?" (below is the culinary version of this scenario)
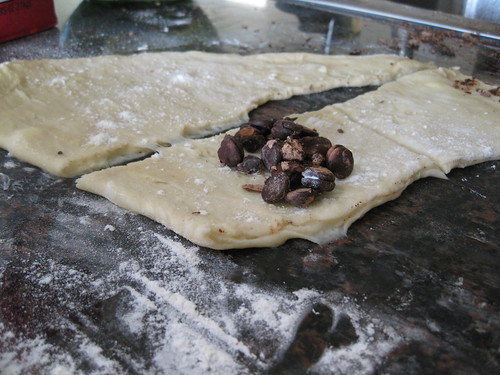
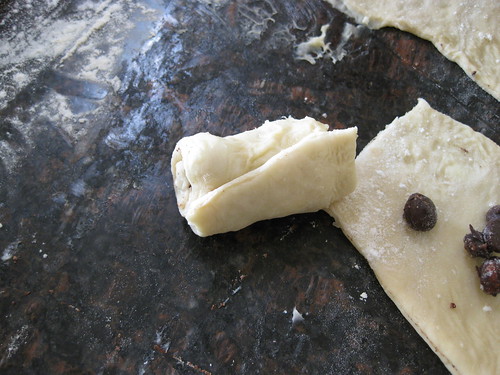
Variations: cut horrible uneven "square shapes" and fill with your confiture of choice, or a gaggle of bloomed Belgian dark chocolate chips like I used here from the back of the fridge.
Here we see a classic case of childhood selfishness, wherein the patient refuses to share and conceals all chocolate from outside forces.
Allow to rise Place the croissants onto a baking sheet lined with parchment (not entirely necessary, as there's so much butter I don't think you'll have trouble removing them). Place inside clean plastic bag and leave to double in size. Or, if you don't live in England, leave in a warm, draft-free area for 1-2 hours sans bag. Ooh, "sans." Look how continental these are making me.
We've all seen "The Wedding Singer," yeah? That scene where Robbie's fiancee Linda has just left him and he goes to sing at a wedding anyway, and is so raw and emotional in a way only seen in gritty documentaries and 80s period pieces, including the part where he points out the Mutants at Table Nine.
You know, the ones who looked FUBAR?
I'm baring my soul here. Have mercy.
p.s., pre-proof and post-proof. Think maybe I should have been a little less ambitious for my first yeasted recipe?
Preheat the oven Set the oven to 190ºC (375ºF).
Wash and bake Once the croissants have risen remove the plastic bag, if necessary. Very gently brush them with the egg wash. Place into the center of the oven and bake for roughly 15 minutes. When they are a deep golden brown remove them from the oven.
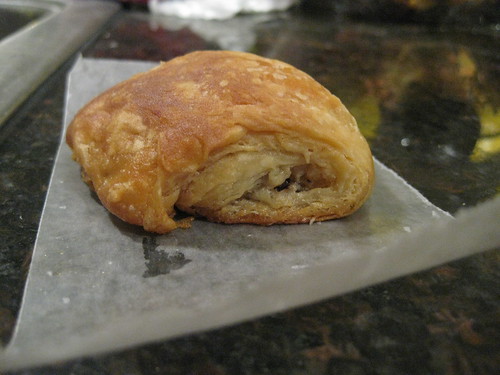
One of my less-unfortunate looking attempts at pain au chocolat.
Serve Your croissants are now ready to serve! They go well with anything, from plain butter, jam and marmalade to ham and cheese. By the way, serving this butter pastry with butter is a GREAT idea. Tell all your friends. And thank you for bearing with me. Don't try this at home.
Ingredients: 17 1/2 oz flour 1/2 oz yeast 3 1/8 oz sugar 1/2 oz salt 10 1/8 oz warm milk 12 oz butter, room temperature 1 egg beaten with 2 tbsp water extra flour for dusting
1. Put the flour into the mixer. Add salt, sugar, milk and yeast. Mix on low for 8-10 minutes until it has a smooth elastic consistency. Dust the dough and a large bowl with flour. Remove the dough from the mixer and transfer it into the bowl. Cover with the towel and let rise until it doubles in size, roughly 1.5 to 2 hours.
2. Put a sheet of plastic wrap onto work surface. Place the butter on top and cover it with a second layer of plastic wrap. Flatten with hands, then use a pin to roll into a rectangle about 20 X 25 cm (a sheet of copy paperish) and place into the fridge to chill.
3. After the dough has doubled in size, sprinkle with a little bit of flour. Gently deflate and place onto a floured work surface. Roll dough out into a large rectangle approximately three times the length of the sheet of butter, adding more flour as needed to prevent the dough from sticking to the work surface or pin.
4. Unwrap the chilled butter and place it onto the middle of the dough. Fold one end over the butter, then the other on top of that. Rotate the dough 90 degrees so the open end of the dough is facing you and the seam is vertical, and roll into another rectangle about the same length it was originally. Fold this into thirds again, brushing off the excess flour as you go. This completes the first turn.
If there is an issue at any point with the butter oozing out of the ends or squishing through the dough, the butter is too warm and needs to go back in the fridge to firm up again. Once the first turn is done, wrap tightly in plastic wrap and place into the fridge for a minimum of 30 minutes.
5. At the end of the 30 minutes (or however long you need), sprinkle work surface with flour. Unwrap the dough and make sure that the it is placed with the seam vertical (that is, running up and down in relation to you). Dust with flour and roll it out into another rectangle. Fold, brush and wrap, exactly as before. This now completes the second turn.
6. Place the back into the fridge for another 30 minutes. Once removed, roll and fold for the third and final turn. Make sure that the dough is well wrapped before placing into the fridge once more to chill overnight.
7. Once chilled, cut the unwrapped dough into half on a floured surface. Dust the dough with some flour and roll one half of the dough into a rectangle. Reflour the surface when necessary and continue to roll until the dough is roughly less than half a centimetre thick. Trim the edges of the dough neatly and cut into triangle shapes. Take the bottom of the triangle at its widest part and tightly roll it up. Freeze the other half of the dough for later use, or repeat the process to make more.
Variations: cut dough into smaller rectangles and roll around a stick of high-quality bittersweet or unsweetened chocolate, placing on a sheet seam-side down.
8. Place the croissants onto a baking sheet, lined or not. Place inside clean plastic bag or in a warm, draft-free area and leave to double in size, about 1-2 hours.
9. Preheat the oven to 375F. Remove the plastic bag, if necessary, once the croissants have risen. Very gently brush them with the egg wash. Place into the center of the oven and bake for roughly 15 minutes. When they are a deep golden brown remove from the oven and serve immediately with a mug of hot chocolate, ignoring the terrible mess in your kitchen while trying not to cry.
Variations: 1. Go to Paris 2. Enter a patisserie 3. Politely ask for un (ou neuf) croissant(s), s'il vous plaît 4. PAY and then leave 5. Serve immediately with a mug of hot chocolate
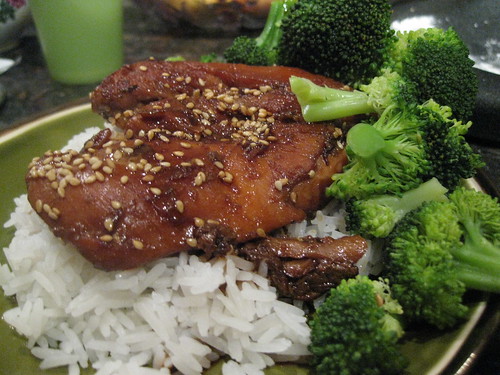
I saw this delicious-looking recipe on Soy and Pepper and decided to make it that night for dinner the next day. With so few ingredients, I knew I couldn't eff up that badly.
I love how confident I am in myself sometimes, despite how wrong I can be. Honestly, I didn't really ruin the dish. It was just lacking that oomph, that extra something that makes chicken teriyaki such a distinct and delectable dish: sticky-sweet, tender chicken meat good enough to be served over plain rice. Which reminds me, I've got a big ol' rice cooker sitting in my Honda Civic right now. Any more stereotypes you want to throw my way? I'm ready.
Anyway, I realized later that I had, in my ignorance, decided to substitute the mirin with michiu. Mirin is a Japanese rice wine with a sugar content that can go up to 50%, meaning it is sweet. Michiu is a Chinese rice wine that is not sweet. Try not to swap the two when the dish's signature taste is, well, sweet.
Ingredients: 4 chicken thighs, skinless and boneless (I buy kosher because it eases my carnivorous guilt) 3 tbsp light soy sauce 3 tbsp mirin 2 tbsp sake 3 tsp sugar toasted sesame seeds for garnish
Directions 1. Prepare the chicken by rinsing and patting thoroughly dry. Place in a bowl and add soy sauce, sake, mirin and sugar. Mix well and leave to marinate in the fridge for at least 30 minutes or overnight. 2. Heat some oil in a skillet over medium-high heat. Remove chicken from the bowl and pan fry for about 2 minutes on each side until the chicken is nicely browned. 3. Add 5 tbsp water to the reserve marinade (whatever's left in the bowl) and pour over the chicken. Cover and simmer on low heat until cooked through, about 2 minutes. 4. Uncover, increase the heat and reduce the sauce to a glaze to coat the chicken, being careful not to burn the sauce. Remove chicken and slice. Pour remaining teriyaki sauce over the chicken and sprinkle with toasted sesame seeds. Serve over warm rice alongside grilled vegetables. Eat slowly, puzzled, you figure out the mirin mystery.
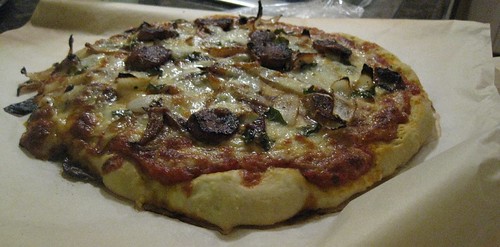
I made this pizza with some of the marinara sauce I had leftover from the lasagna rolls. The toppings include chicken sausage and grilled onions and I'm not sure what else. Spinach? Cotton? Don't ask me to remember these things.
I can't remember which recipe I used for the dough but I'll leave you with my current one, which comes from Peter Reinhart's much-lauded "The Bread Baker's Apprentice." This recipe makes a whole mess of dough that I freeze. When the mood hits I get very excited, remember my dough is frozen, disappointedly move it to the fridge, wait 24 hours, then make pizza. Other than that my method is perfect.
This recipe was also the November Daring Bakers' Challenge, so that might hint that it's fairly lengthy. Other than the proofing times, though, it's a pleasure to work with and is really helpful for those people like myself who like to make a big mess in the kitchen all at once, instead of several little messes.
It really is worth the time. The dough is soft and pliable and bakes into a crusty, chewy bread. Making the entire batch for one night is great for a crowd and allows all kinds of crazy variations. I brought a tray of these relaxed balls (I love being able to say these things) to a friend's house and spent an evening testing a buttload (sorry) of pizza toppings. Some of my favorites are a slather of pesto and slices of mozzarella, baked until bubbly then draped with prosciutto and fresh arugula right out of the oven; some sweet butter and a sprinkle of cinnamon sugar; and a generous glaze of garlic-infused oil under studs of crumbled feta, melted mozzarella and dollops of freshly strained ricotta. What can I say, I'm from California. I eat salad on pizzas.
Basic Pizza Dough from "The Bread Baker's Apprentice" by Peter Reinhart
Makes 6 pizza crusts (about 9-12 inches/23-30 cm in diameter).
Dough Ingredients: 4 1/2 Cups (20 1/4 ounces/607.5 g) Unbleached high-gluten (%14) bread flour or all purpose flour, chilled 1 3/4 teaspoon salt 1 teaspoon instant yeast 1/4 Cup (2 ounces/60g) olive oil or vegetable oil 1 3/4 Cups (14 ounces/420g or 420ml) water, ice cold (40° F/4.5° C) 1 tablespoon sugar Semolina/durum flour or cornmeal for dusting
DAY ONE 1. Mix together the flour, salt and instant yeast in a big bowl (or in the bowl of your stand mixer). 2. Add the oil, sugar and cold water and mix well (with the help of a large wooden spoon or with the paddle attachment, on low speed) in order to form a sticky ball of dough. 3. On a clean surface, knead for about 5-7 minutes, until the dough is smooth and the ingredients are homogeneously distributed. If it is too wet, add a little flour (not too much, though) and if it is too dry add 1 or 2 teaspoons extra water. NOTE: If you are using an electric mixer, switch to the dough hook and mix on medium speed for the same amount of time.The dough should clear the sides of the bowl but stick to the bottom of the bowl. If the dough is too wet, sprinkle in a little more flour, so that it clears the sides. If, on the contrary, it clears the bottom of the bowl, dribble in a teaspoon or two of cold water. The finished dough should be springy, elastic, and sticky, not just tacky, and register 50°-55° F/10°-13° C. 4. Flour a work surface or counter. Line a jelly pan with baking paper/parchment. Lightly oil the paper. 5. With the help of a metal or plastic dough scraper, cut the dough into 6 equal pieces (or larger if you want to make larger pizzas). NOTE: To avoid the dough from sticking to the scraper/cutter, dip the scraper into water between cuts. 6. Sprinkle some flour over the dough. Make sure your hands are dry and then flour them. Gently round each piece into a ball. NOTE: If the dough sticks to your hands, then dip your hands into the flour again. 7. Transfer the dough balls to the lined jelly pan and mist them generously with spray oil. Slip the pan into plastic bag or enclose in plastic food wrap TIGHTLY. 8. Put the pan into the refrigerator and let the dough rest overnight or for up to thee days. NOTE: You can store the dough balls in a zippered freezer bag if you want to save some of the dough for any future baking. In that case, pour some oil (a few tablespoons only) in a medium bowl and dip each dough ball into the oil, so that it is completely covered in oil. Then put each ball into a separate bag. Store the bags in the freezer for no longer than 3 months. The day before you plan to make pizza, remember to transfer the dough balls from the freezer to the refrigerator.
DAY TWO 1. On the day you plan to eat pizza, exactly 2 hours before you make it, remove the desired number of dough balls from the refrigerator. Dust the counter with flour and spray lightly with oil. 2. Place the dough balls on a floured surface and sprinkle them with flour. Dust your hands with flour and delicately press the dough into disks about 1/2 inch/1.3 cm thick and 5 inches/12.7 cm in diameter. Sprinkle with flour and mist with oil. Loosely cover the dough rounds with plastic wrap and then allow to rest for 2 hours. 3. At least 45 minutes before making the pizza, place a baking stone on the lower third of the oven. Preheat the oven as hot as possible (500° F/260° C). 4. Generously sprinkle the back of a jelly pan with semolina/durum flour or cornmeal or flour. Flour your hands (palms, backs and knuckles). Take 1 piece of dough by lifting it with a pastry scraper. Lay the dough across your fists in a very delicate way and carefully stretch it by bouncing it in a circular motion on your hands, and by giving it a little stretch with each bounce. Once the dough has expanded outward, move to a full toss. NOTE: Make only one pizza at a time. NOTE: During the tossing process, if the dough tends to stick to your hands, lay it down on the floured counter and reflour your hands, then continue the tossing and shaping. In case you would be having trouble tossing the dough or if the dough never wants to expand and always springs back, let it rest for approximately 5-20 minutes in order for the gluten to relax fully, then try again. 5. When the dough has the shape you want (about 9-12 inches/23-30 cm in diameter - for a 6 ounces/180g piece of dough), place it on the back of the jelly pan, making sure there is enough semolina/durum flour or cornmeal or flour to allow it to slide and not stick to the pan. 6. Lightly top it with sweet or savory toppings of your choice. NOTE: Remember that the best pizzas are topped not too generously. No more than 3 or 4 toppings (including sauce and cheese) are sufficient. 7. Slide the garnished pizza onto the stone in the oven or bake directly on the jelly pan. Close the door and bake for about 5-8 minutes. NOTE: After 2 minutes baking, take a peek. For an even baking, rotate 180°. If the top gets done before the bottom, you will need to move the stone or jelly pane to a lower shelf before the next round. On the contrary, if the bottom crisps before the cheese caramelizes, then you will need to raise the stone or jelly. 8. Take the pizza out of the oven and transfer it to a cutting board or your plate. In order to allow the cheese to set a little, wait 3-5 minutes before slicing or serving.
The first time I ever ate biscuits and gravy was during an aerobics class. I love telling this story.
I went to a high school that required 2.5 years of physical education classes. I think to those older than I this would be ridiculous (as opposed to four years) and to some of my contemporaries a bit excessive (many schools require two years). So to avoid being forced to take some random physical course my junior year, I chose to take a summer class with my aerobics teacher. It would be a four hour class, Monday-Friday, and I'd have a year's worth of credit just like that!
Luckily for me, this teacher was very easygoing and a fun person to be around. And because I went to high school in a city near the ocean, to change things up a bit she'd have us meet at the beach for class to walk along the water--an area known as The Strand, a beautiful stretch of pavement for pedestrians, athletes and gawkers that extends primarily from Redondo Beach, through Hermosa Beach to Manhattan Beach.
We'd meet at our spot every day and start walking from one end to the other. We may have done a bit of exercise on the beach itself, but I remember mostly the stroll down the Strand. When she'd dismiss the class we'd sometimes rendezvous (herself included) at some nearby diner or restaurant for lunch, and one day that place happened to be Scotty's on the Strand.
Initially the concept, frankly, grossed me out. It still does in that oh so good way, but come on. It's two buttery biscuits that have been halved, smothered in gravy and served usually along with some sausage. Not exactly beach fare. I'm glad I would wear sweats, but let's just say that I didn't exactly lose weight the summer I decided to take an aerobics class. (Other excursions included a burger joint, where I'd indulge in a crusty grilled cheese on sourdough. I have no regrets.)
And I can't imagine myself ever making this had I not seen The Pioneer Woman's disgustingly delicious-looking recipe for it, and I had to just give in like I did that summer before my junior year. I've accepted the fact that I'm the type of person who gains weight when she takes an exercise class.
It's not too much of a recipe, really. The basic idea is to take the fat from the sausage you've cooked and make a roux with it by adding enough flour for a paste. This is cooked for a bit to remove any raw flour taste and then milk is steadily whisked in to make a sauce (gravy), which is then liberally seasoned and spooned over the biscuits you've baked.
Start by cooking some sausage. This is spicy pork sausage, but any should work (assuming it's fatty; that apple chicken sausage might not be the best for this dish). You'll probably have more success if you cook the kind without casing or remove the casing, because you want to release all the fat that's being held in there.
Gettin' there.
Yeah, that'll work. I got too impatient and broke up the sausage to try to coax that lovely fat out. Shoulda removed the casing.
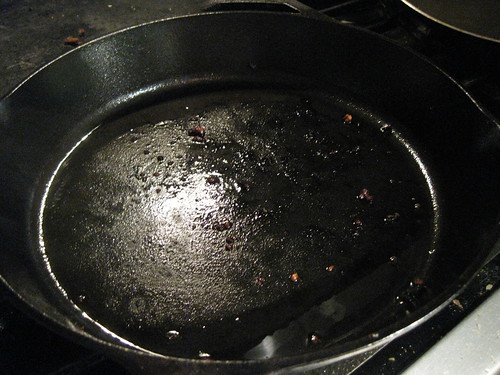
Remove the sausage and leave the fat in the pan. There isn't too much here but if you have a lot, you'll want to pour it out and add back the amount needed.
To make a roux directly in the pan, eyeball the amount of fat and add the equivalent of that in flour. This means for the tablespoonish of fat in my pan I'd whisk a tablespoon of flour and let it all get coated by the grease. If you've poured the fat out, it's easy to measure equal amounts. You're going for a stirrable paste that is not too dry or too wet. Once the flour is added let the roux cook a little. It'll start to deepen in color. Keep whisking.
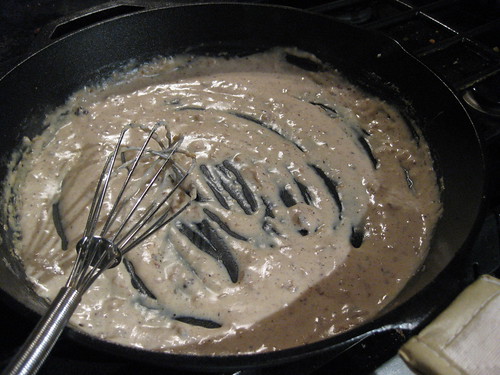
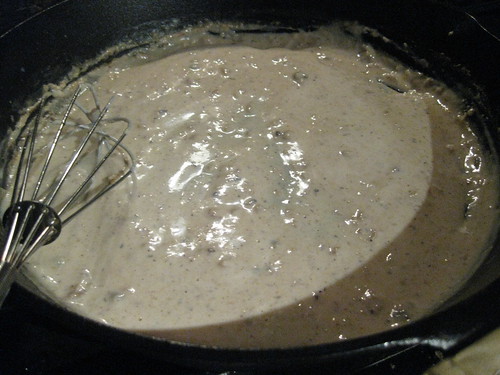
Whisking constantly, slowly pour in milk 1 cup at a time. I'd say 1 tablespoon of fat with a tablespoon of butter should need roughly 1 cup of milk, so work with that ratio. The consistency you're going for is a bit thinner than a traditional gravy, because the heat will thicken your sauce quite a bit as it sits on the heat. Taste and season liberally; because you've just diluted your roux with a bunch of milk it'll taste pretty bland--I mean Ann. Once it's gotten a chance to set up and bask in its fatty glory you've got some creamy gravy on your hands! No literally, like all over your hands. Don't ask me how gravy has that effect. In any case, go crazy!
Or just spoon over biscuits and serve. Try not to eat too many. Well, do whatever you want. But seriously, you might regret it. In your stomach, not your heart.
One thing I've learned about biscuits & gravy is that it gets cold fast and most stomachs can't handle too much of this too quickly. Make and serve only what you think you can eat immediately, because the gravy cools down at the end while you're still working your way through the front. It helps to have other people, as long as they are nice people. Enjoy!
My sister and I have been meaning to try this place out for a while due to all its amazing reviews on Yelp, so we hopped in the car with Lauren yesterday at 6 and headed to downtown Long Beach. I'm happy to report that Bouchees Bistro is only open for lunch on Mondays.
I'm not going to lie. OK? Is there some leeway I get for being forthright? I can't believe I'm admitting this. We ended up eating at Hometown Buffet that night.
Yeah. I could make all these excuses about how it was right next to the meter which we'd just poured all our change into to park. About how the door was open and throngs of happy laughing people were headed inside too, and how the irresistible aroma of fried chicken wafted out through the windows thrown open to let a soft breeze curl in. But I really don't have a good reason. It's enough that we went, and ate, and left.
Anyway, I felt determined to rectify the bad, bad decisions of the last 24 hours. There was no choir rehearsal tonight (even though our concert's on Sunday) so I insisted Kim and I go back today to eat. You know, to the bistro. Not the other place.
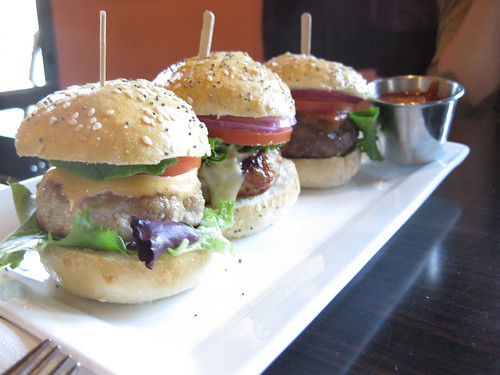
We made it in time for happy hour (Tuesday-Friday, 4pm-7pm), so my sister got the slider trio for $9, with an extra $.50 charge for a combo of sweet potato fries in addition to the parmesan herb fries.
Left to right: Ahi tuna and avocado, turkey and shiitake mushroom, and American beef with cheddar cheese The tuna was good but I found the sauce a little watery and uneventful. The turkey slider was juicy and hot, the mushrooms flavorful. I didn't try the beef, but my sister deemed the tuna the best.
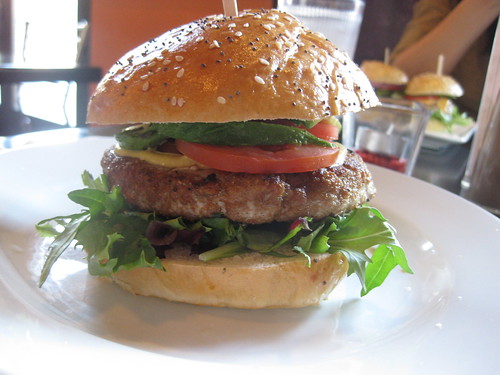
I ordered the regular (read: full) -sized Ahi tuna and avocado burger for $11, which comes with a "spicy chili garlic sauce." When I asked what that might entail I heard the word "mayonnaise" somewhere in there and requested mine with Dijon mustard instead. During happy hour regular burgers come with a side of fries thrown in for free (generally $4), so I ordered the sweet potato/parmesan combo as well.
The burger was excellent: browned on the outside but still nicely tender and pink in the middle. I thought the mustard gave it a nice spicy touch that lent itself well to the mild meatiness of the ahi. The poppy-sesame seed buns were soft and a little salty, which was really interesting. I would have liked the tomatoes to have been less mealy, especially considering heirlooms are currently being hauled into farmers' markets by the truckload, but overall an extremely tasty burger.
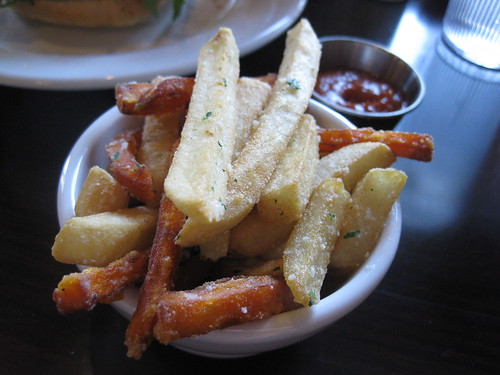
Sweet potato fries and parmesan herb fries, served with homemade ketchup.
One thing I'm not really used to is actually getting dessert when I go out. Unless I've prepared for it I never have room at the end of my meal, so I was pleasantly surprised that by the time I'd cleaned off my burger and the fries I felt comfortable enough to order their special: a house-baked cookie ice cream sandwich, $4. Today featured a double chocolate cookie with vanilla bean gelato and strawberry coulis.
The cookies were soft and thick, not overwhelmingly sweet, and the gelato was perfectly creamy and dense. I was expecting more of a dark cookie from the description, but no complaints here:
Service was friendly and accommodating, even when a cup of ketchup got dropped nearby. Luckily no one was splatted. I think I saw the chef for a second but didn't have the nerve to talk to him, otherwise I would have told him how enjoyable our meal was. I would definitely go again just for the dessert, which I found satisfying and very well portioned for two. To be honest I could have ordered and eaten a second one, but I'm on a budget here. It's expensive to keep that food baby of my sister's kicking. Trust me, you wouldn't want a shot of that.
bouchees bistro 515 Long Beach Blvd Long Beach, CA 90802 562-951-8222 www.bouchees.com
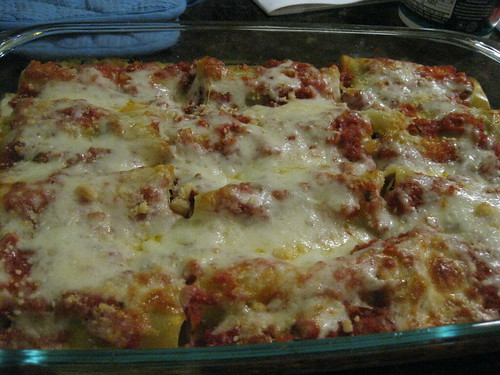
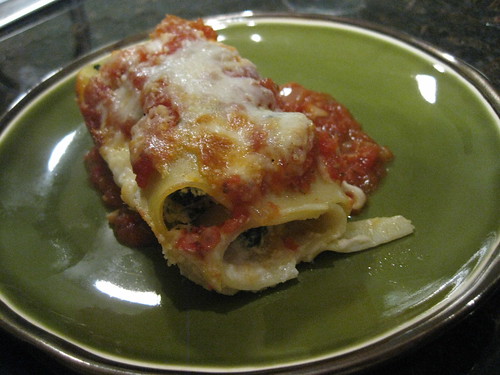
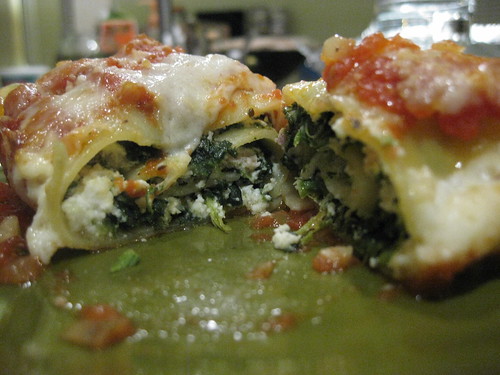
I haven't had too many successful lasagne runs, so this recipe appealed to me when I first saw Giada make it on her show a few years ago. Instead of layering the components of the dish, this recipe calls for a filling of ricotta, prosciutto and spinach to be spread onto individual lasagna noodles. These are then rolled up before being sandwiched between a béchamel sauce and a simple marinara sauce and baked.
What I love about the dish is its format; having twelve defined sections makes it really easy to pack and reheat. I've made this several times, and though I've yet to perfect the recipe to my liking I think it's pretty acceptable. Usually I just have a problem with the sodium. I remember my human physiology professor telling us to avoid two things in life: salt and stress. So while I never hesitate when it comes to rich, full flavors (whole milk, heavy cream, and oh gods the cheeses) I tend to scrimp on seasoning sometimes.
Thus when it comes to this recipe, which calls for three ounces of prosciutto, I find it can be a bit bland because I underseason. I buy prosciutto di Parma, which is more mild than domestic prosciutto, but I still think, "Well...it's got enough salt." But honestly, that can get lost amid all the components. Just be sure to salt and taste the filling before assembly. For the marinara sauce I use a recipe from Giada's wonderful book "Giada's Family Dinners," which like all her books are full of simple and elegant dishes.
Lasagna 1 (15-ounce) container whole milk ricotta cheese 1 (10-ounce) package frozen chopped spinach, thawed, squeezed dry 1 cup plus 2 tablespoons grated Parmesan 3 ounces thinly sliced prosciutto, chopped 1 large egg, beaten to blend 3/4 teaspoon salt, plus more for salting water 1/2 teaspoon freshly ground black pepper 1 to 2 tablespoons olive oil 12 uncooked lasagna noodles 2 cups marinara sauce (recipe follows) 1 cup shredded mozzarella (about 4 ounces)
Quick Marinara Sauce 2 (28-ounce) cans whole tomatoes in juice 1 bunch fresh basil, stemmed 1/2 cup extra-virgin olive oil 2 small onions, finely chopped 4 garlic cloves, finely chopped 1 teaspoon dried oregano 1 teaspoon sugar salt and freshly ground black pepper
To make the sauce: Melt the butter in a heavy medium saucepan over medium-low heat. Add the flour and whisk for 3 minutes. Whisk in the milk. Increase the heat to medium-high. Whisk the sauce until it comes to a simmer and is thick and smooth, about 3 minutes. Whisk the salt, pepper, and nutmeg into the bechamel sauce.
To make the marinara: In a blender, add both cans of tomatoes (mine can only take one can at a time, so I do it in batches) and puree with the basil. Set aside. Heat the oil over medium in a large saucepan. Saute the onions and garlic until very tender, then stir in tomato puree and remaining ingredients. Bring to a simmer over medium-high and then reduce the heat to medium. Allow the sauce to bubble until it thickens slightly, about 10 minutes with the occasional stir. Season to taste. Yield: about 6 cups. Freeze the remainder in 1-cup portions to pull out and reheat as needed.
Preheat the oven to 450 degrees F.
Whisk the ricotta, spinach, 1 cup Parmesan, prosciutto, egg, salt, and pepper in a medium bowl to blend.
Bring a large pot of salted water to boil. Boil the noodles until just tender but still firm to bite. Drain. Arrange the noodles in a single layer on a baking sheet to prevent them from sticking.
Butter a 13-by-9-by-2-inch glass baking dish. Pour the bechamel sauce over the bottom of the prepared dish. Lay out 4 lasagna noodles on a work surface, then spread about 3 tablespoons of ricotta mixture evenly over each noodle. Starting at 1 end, roll each noodle like a jelly roll. Lay the lasagna rolls seam side down, without touching, atop the bechamel sauce in the dish. Repeat with the remaining noodles and ricotta mixture.
Spoon 1 cup of marinara sauce over the lasagna rolls. Sprinkle the mozzarella and remaining 2 tablespoons of Parmesan over the lasagna rolls. Cover tightly with foil. Bake until heated through and the sauce bubbles, about 20 minutes. Uncover and bake until the cheese on top becomes golden, about 15 minutes longer. Let stand for 10 minutes. Meanwhile, heat the remaining marinara sauce in a heavy small saucepan over medium heat until hot and serve alongside.